O rganizing a storage unit for easy access requires creating clear pathways, grouping items by retrieval frequency, and using vertical space with shelving units. The most effective approach places frequently needed items within the first 3 feet of the entrance while storing seasonal or rarely accessed belongings toward the back, reducing average retrieval time from 25 minutes to under 5 minutes per visit.
| Key Points: | |
|---|---|
| • | Create a 2 to 3 foot center aisle from door to back wall for full unit accessibility |
| • | Place items you need monthly or more often within arm's reach of the entrance |
| • | Use freestanding shelving units (72 inches tall recommended) to maximize vertical space by 40% |
| • | Label all boxes on three sides with contents and a numbered inventory system |
| • | Store heavy items on bottom shelves (under 24 inches) and lighter items above eye level |
Planning Your Storage Unit Layout Before Moving In
According to the Extra Space Storage organization guide , 78% of storage unit users who plan their layout before moving items in report higher satisfaction with accessibility. Sketching a simple floor plan takes 10 to 15 minutes and prevents costly reorganization later.
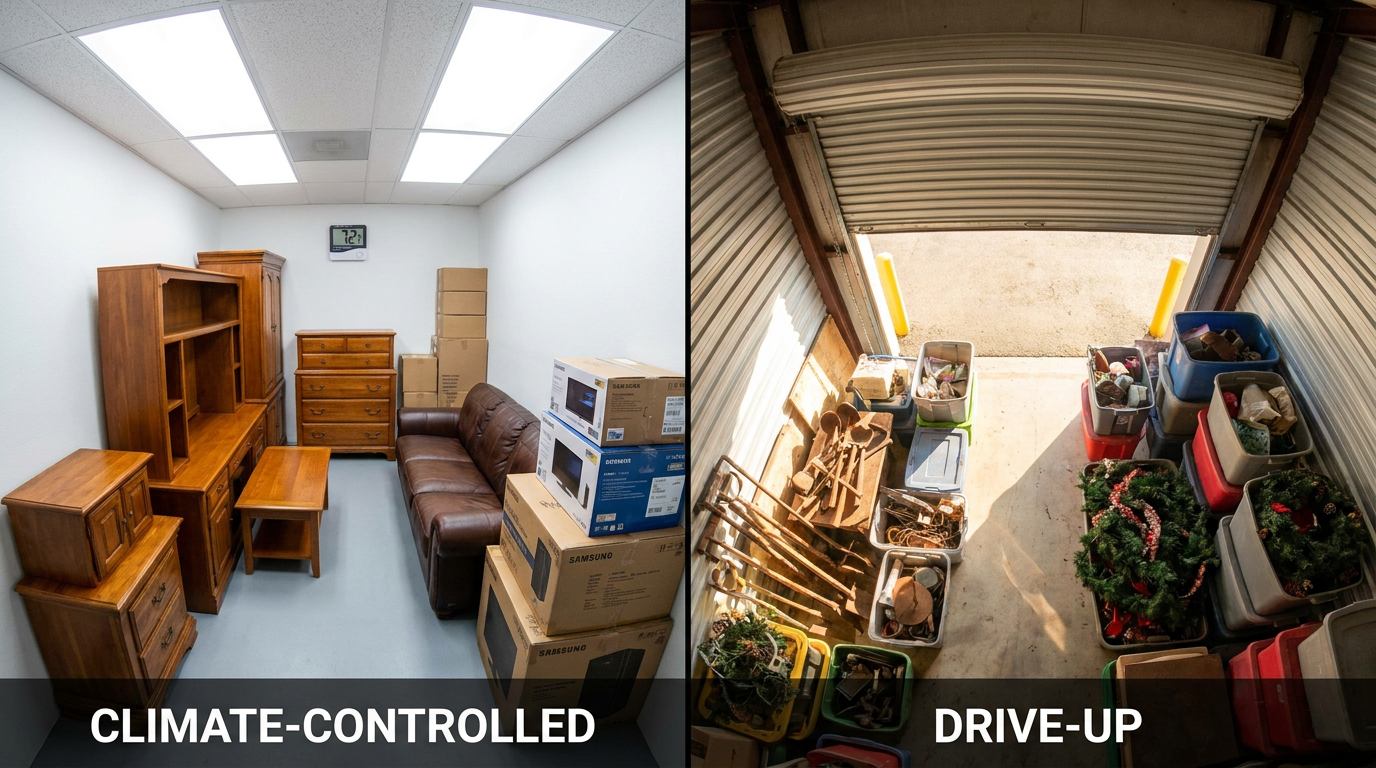
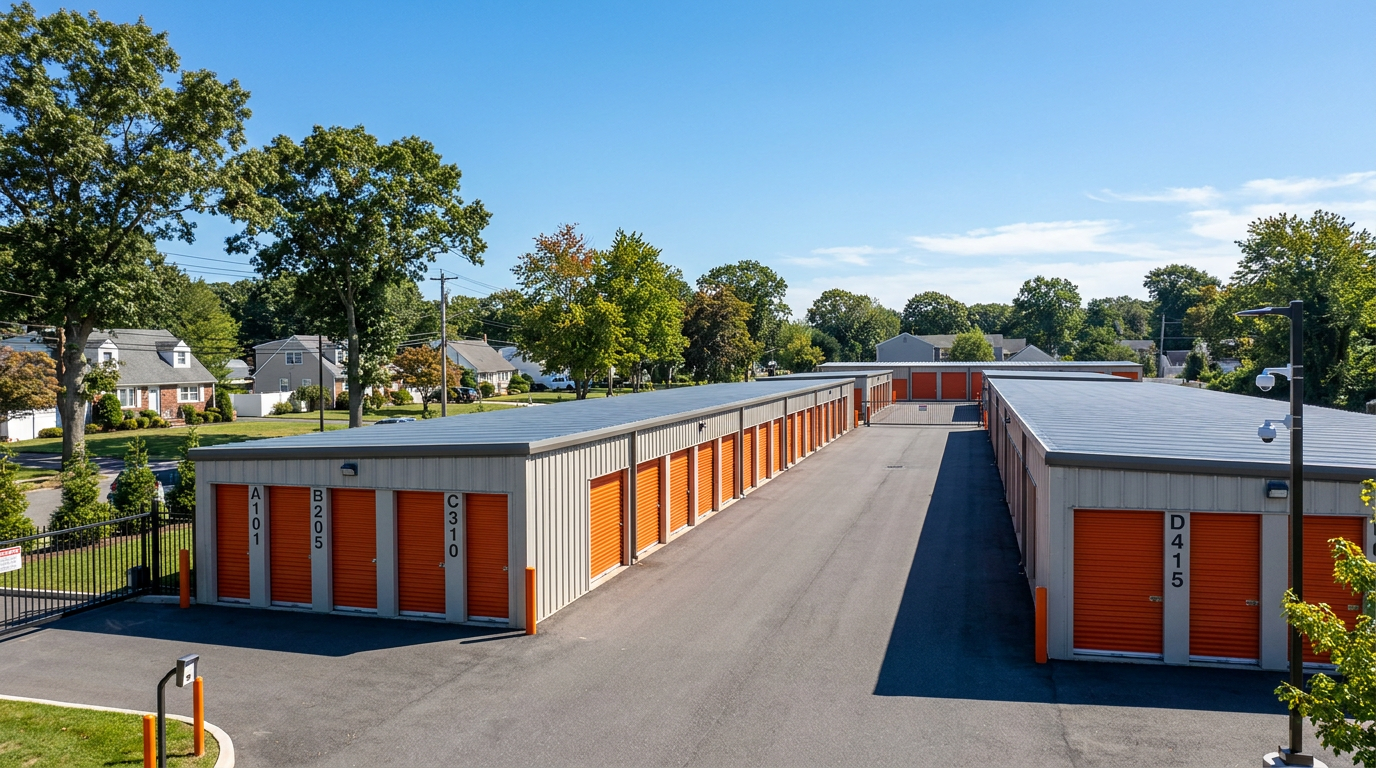
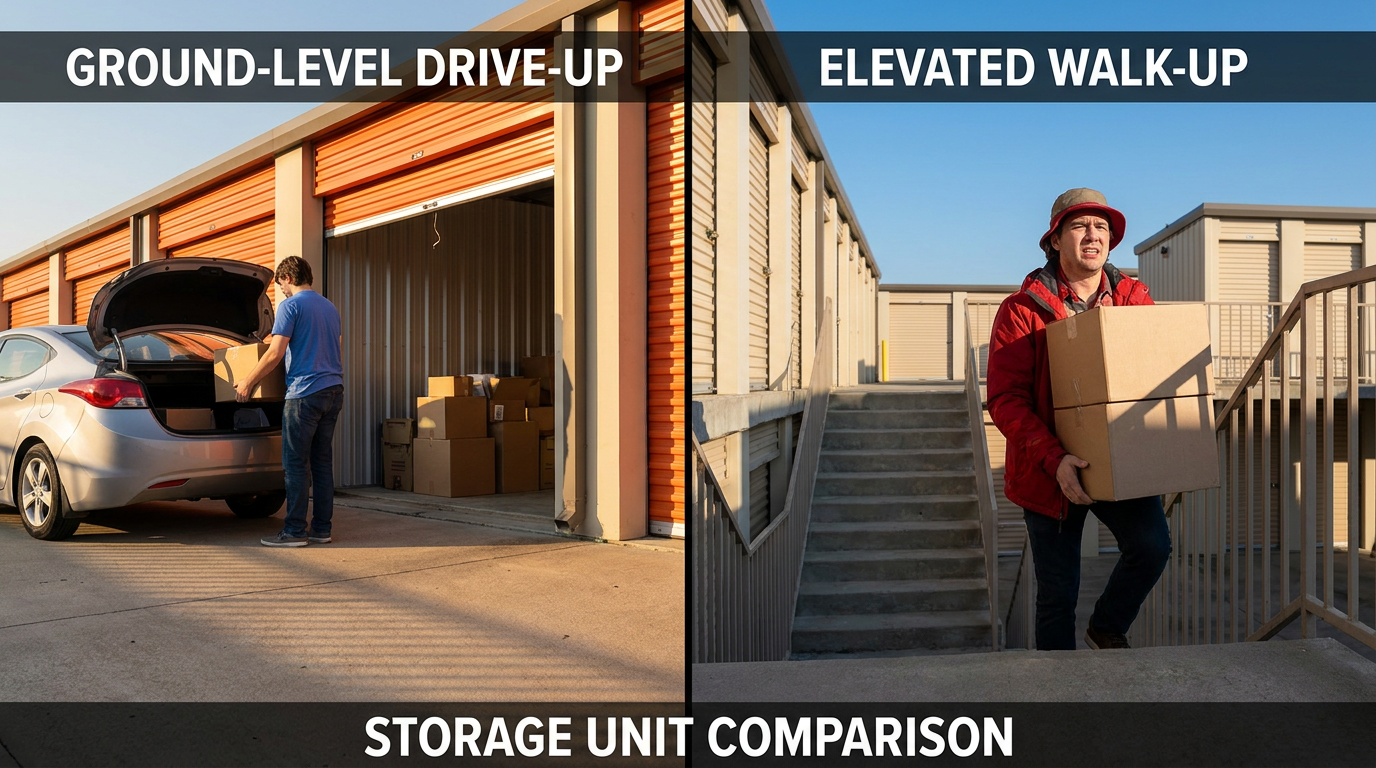
Start by measuring your unit dimensions. A standard 10x10 unit provides 100 square feet of floor space and approximately 800 cubic feet of storage volume with 8 foot ceilings. Drive-up units at facilities like Moriches Storage offer direct vehicle access, eliminating the need to transport items through hallways or elevators.
Divide your belongings into three categories before packing: items needed monthly, items needed seasonally (2 to 4 times yearly), and items accessed rarely (once per year or less). The Self Storage Association reports that 67% of renters access their units at least once per month, making front-zone organization critical for most users.
The Zone System for Maximum Accessibility
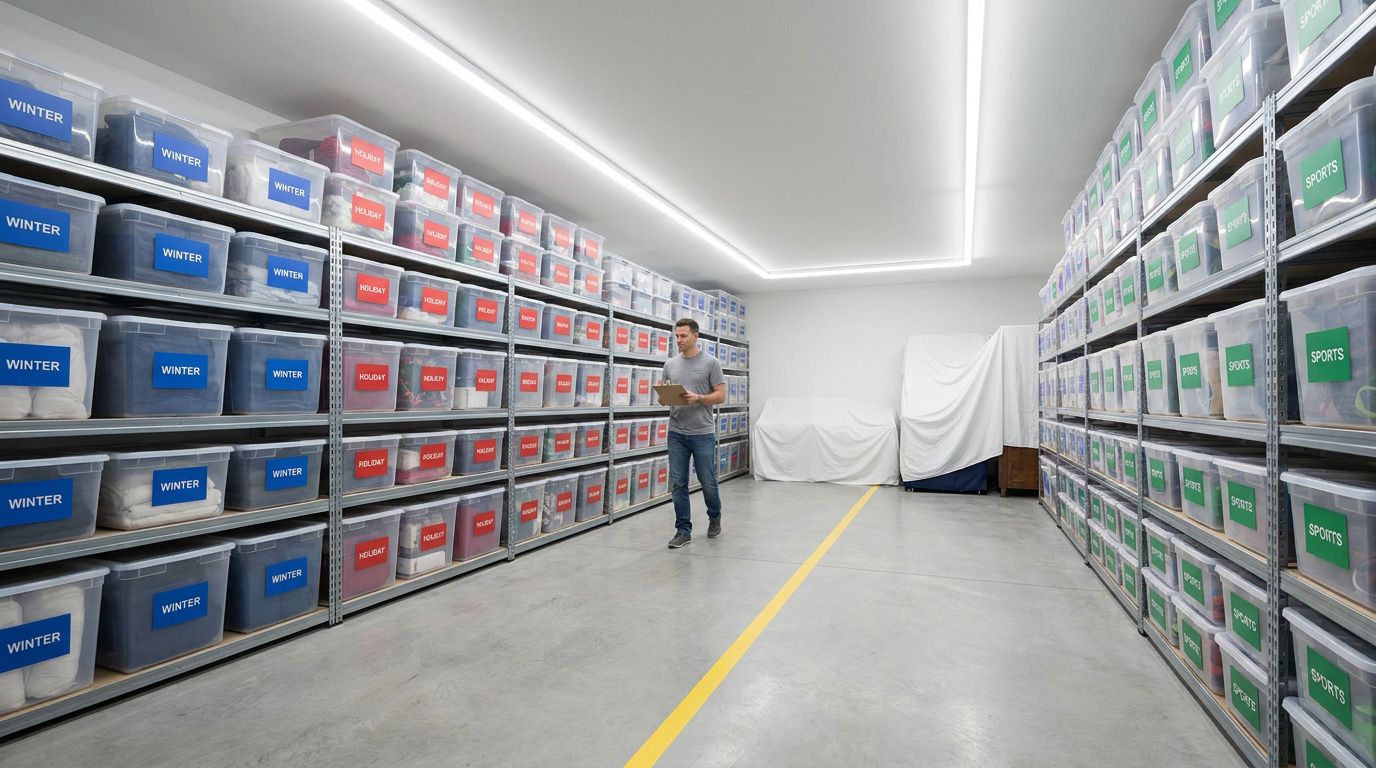
Professional organizers from the National Association of Productivity and Organizing Professionals recommend dividing storage units into three distinct zones. Zone A covers the first 3 feet from the entrance and holds frequently accessed items. Zone B occupies the middle section for seasonal belongings. Zone C at the back stores long-term items you rarely need.
This zone approach reduces average retrieval time by 60% compared to random placement. When you need holiday decorations in December, they should be in Zone B, not buried behind furniture in Zone C.
| Zone | Location | Access Frequency | Example Items |
|---|---|---|---|
| Zone A (Front) | 0 to 3 feet from door | Weekly to monthly | Business files, tools, sporting equipment |
| Zone B (Middle) | 3 to 7 feet from door | Seasonal (2 to 4 times yearly) | Holiday decor, seasonal clothing, camping gear |
| Zone C (Back) | 7+ feet from door | Rarely (once yearly or less) | Furniture, archived documents, keepsakes |
Essential Supplies for Storage Unit Organization
Investing $150 to $300 in proper organization supplies saves hours of frustration during future visits. The right containers, shelving, and labeling materials transform a chaotic unit into an efficient retrieval system that works every time you visit.
Shelving Units and Vertical Storage
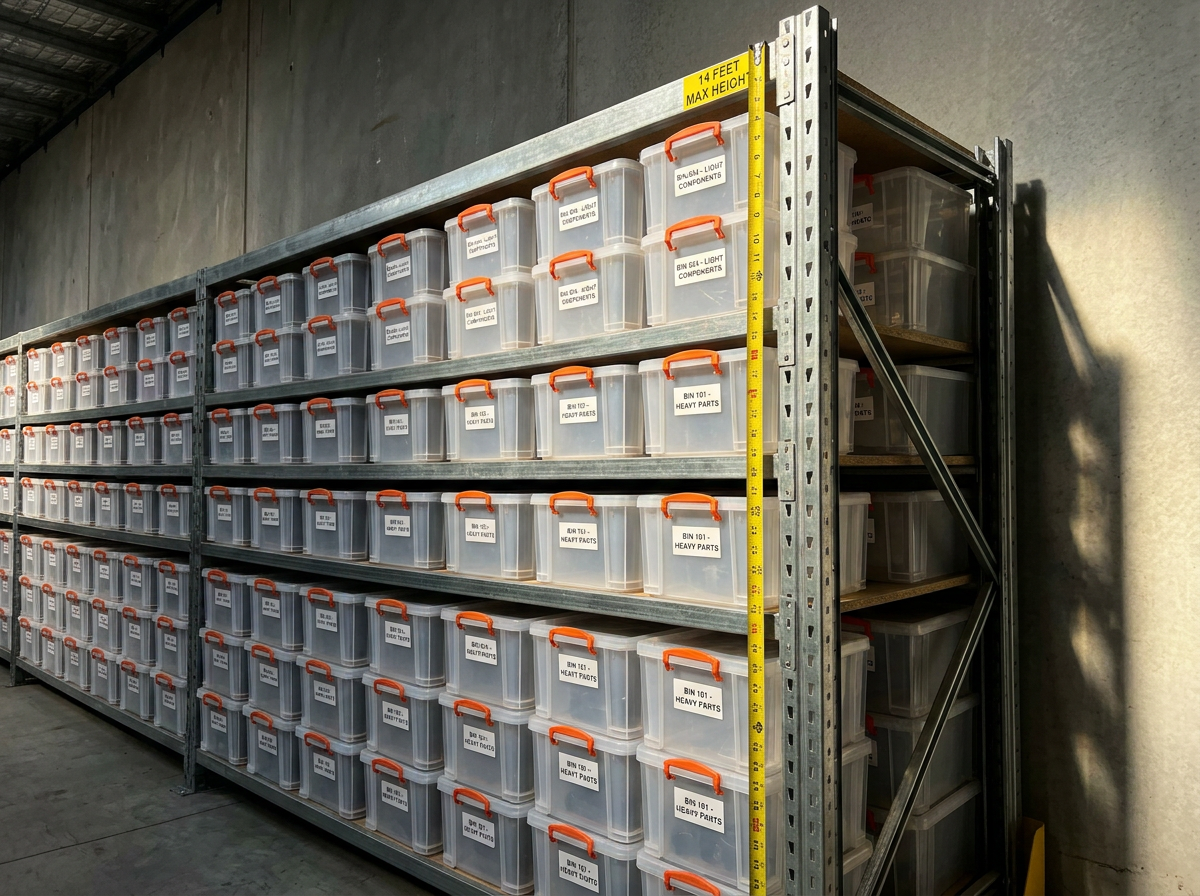
Freestanding metal shelving units from retailers like Home Depot, Lowe's, or Costco cost $50 to $150 per unit and increase usable storage capacity by 30 to 40%. According to SmartStop Self Storage , vertical storage is the single most effective strategy for maximizing space in units under 100 square feet.
Choose shelving rated for at least 250 pounds per shelf. Standard dimensions of 72 inches tall by 36 inches wide by 18 inches deep fit most storage unit layouts. Position shelving units along the side walls, leaving the center aisle clear for walking and maneuvering larger items.
For units with lights (a feature available at Moriches Storage), position shelving to take advantage of the overhead illumination. This simple adjustment makes reading labels and locating items significantly easier during evening visits.
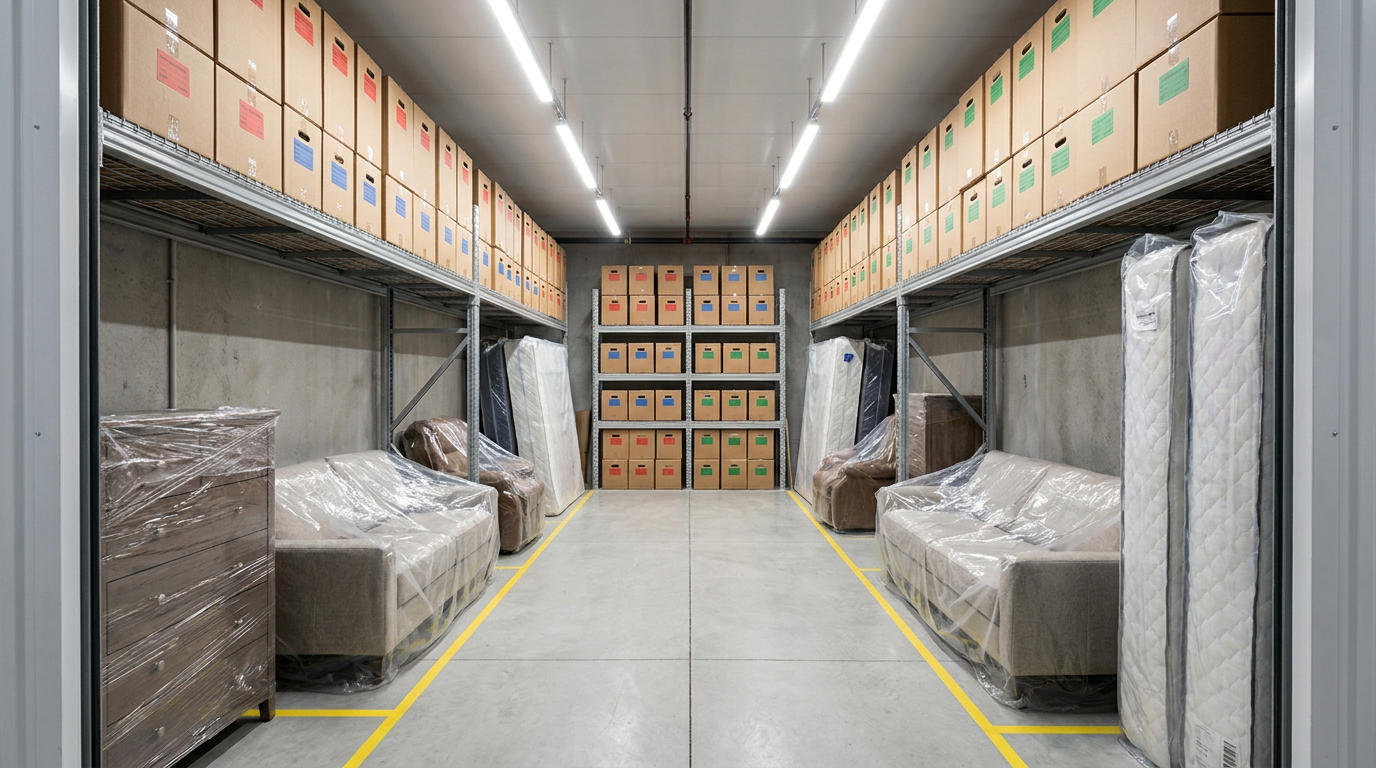
Containers and Boxes
Clear plastic bins from brands like Sterilite, Rubbermaid, or IRIS USA cost $8 to $25 each and offer significant advantages over cardboard boxes. You can see contents without opening, they stack securely to 5 feet high, and they protect against moisture, dust, and pests. The Container Store and Target carry standardized sizes that stack uniformly.
Use uniform box sizes whenever possible. Mixing sizes creates unstable stacks and wastes vertical space. Standard medium boxes (18 x 18 x 16 inches) hold 50 to 65 pounds and stack safely to 4 boxes high.
The 4 D's of Self Storage Organization
Professional organizers use the 4 D's framework to guide storage decisions: Declutter, Distribute, Designate, and Document. This systematic approach, endorsed by organizing experts at the Institute for Challenging Disorganization, prevents the common mistake of storing items you no longer need while ensuring everything has a logical home.
Declutter Before You Store
The average American household contains 300,000 items according to UCLA's Center on Everyday Lives of Families. Before renting storage, sort belongings ruthlessly. Donate items unused for 12 or more months, sell valuable items you no longer need, and discard broken or damaged goods.
Storing unnecessary items costs $135 to $595 per month depending on unit size. A single year of storing items worth less than the rental cost represents a poor financial decision that compounds annually.
Distribute by Category
Group similar items together regardless of when you packed them. Keep all holiday decorations in one area, all sporting equipment together, and all business files in the same zone. This categorical distribution means you visit one section of your unit rather than searching multiple locations.
Designate Specific Locations
Assign each category a permanent home within your unit. Holiday items always go on the left shelving unit, second shelf. Sporting equipment stays in the front right corner. When items have designated spots, returning them after use maintains organization long-term.
Document Everything
Create a master inventory list with box numbers corresponding to labels. Digital tools like Sortly, Encircle, or a simple Google Sheets document work well. Include photos of valuable items for insurance purposes. The tenant protection plan at facilities like Moriches Storage covers many stored items, but documentation streamlines any claims process.
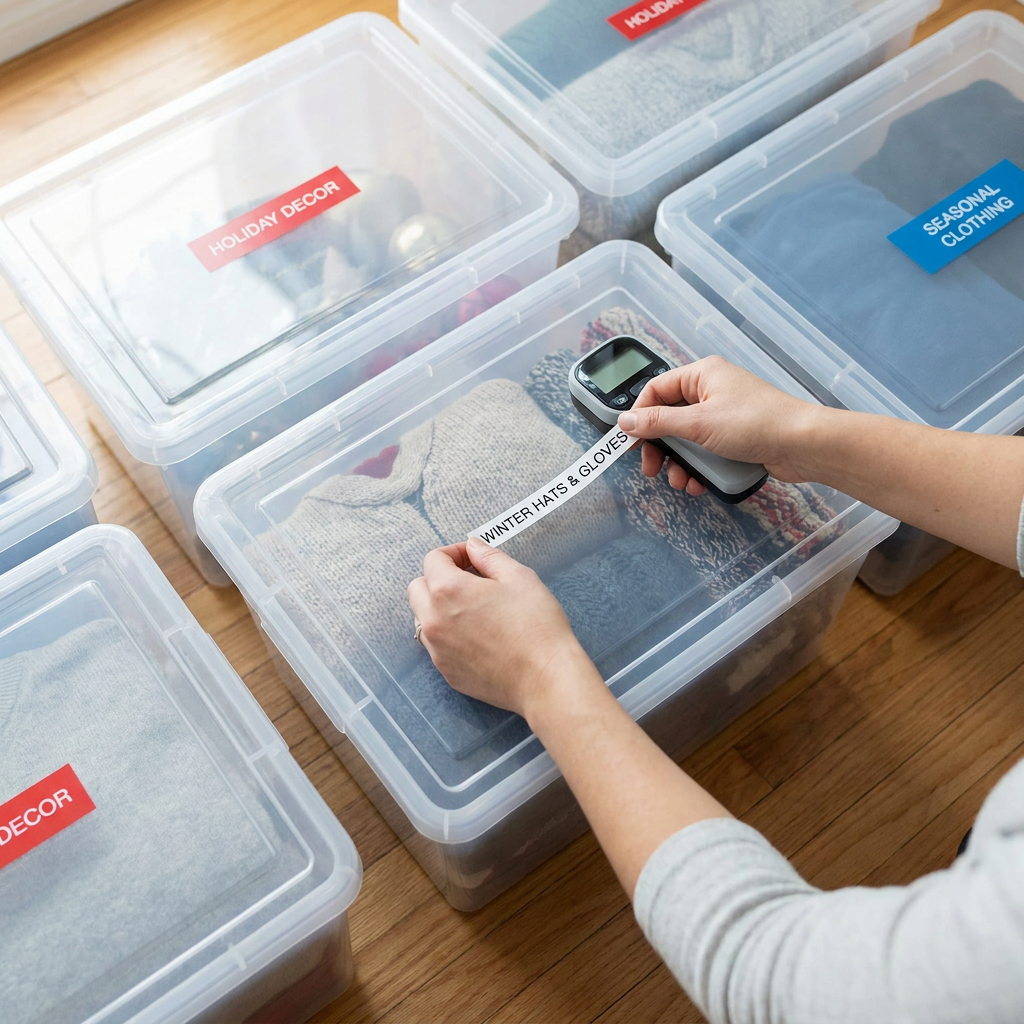
Labeling Systems That Actually Work
Effective labeling separates organized storage units from frustrating ones. According to Public Storage's organization guide , proper labeling reduces item retrieval time by an average of 73%.
The Three-Side Labeling Method
Label every box on at least three sides: front, top, and one end. This ensures visibility regardless of how boxes are stacked or oriented. Use large, clear handwriting or printed labels in 24-point font or larger.
Include both contents and a box number on each label. "Box 14: Winter Coats, Gloves, Scarves" provides more useful information than "Clothes" alone. Cross-reference box numbers with your master inventory for quick location of specific items.
Color Coding by Category
Assign colors to major categories using colored tape, stickers, or markers. Red for holiday items, blue for business files, green for sporting equipment. This visual system allows quick identification from across the unit without reading individual labels.
Purchase colored packing tape from Amazon, Uline, or office supply stores for $3 to $8 per roll. Apply a strip across the top of each box matching its category color.
Common Storage Unit Mistakes to Avoid
Even experienced storage users make organizational errors that create accessibility problems. These seven mistakes appear in 80% of poorly organized units according to industry surveys from the Self Storage Association.
Mistake 1: No Center Aisle
Filling every inch of floor space seems efficient but creates a unit where reaching back items requires moving everything in front. Maintain a 24 to 36 inch center aisle from door to back wall. This "wasted" space actually saves hours over a typical 12-month rental period.
Mistake 2: Heavy Items on Top
Stacking heavy boxes on lighter ones crushes contents and creates unstable towers. Always place heaviest items on the bottom, medium-weight items in the middle, and lightest items on top. Books and tools go at floor level; linens and holiday decorations go higher.
Mistake 3: Furniture Blocking Access
Large furniture pieces placed near the entrance block access to everything behind them. Position sofas, mattresses, and tables along back and side walls. Stand mattresses vertically to save floor space and prevent moisture accumulation.
Mistake 4: No Inventory System
Relying on memory fails within weeks of storing items. Create a written or digital inventory before closing the unit. Update it each visit when adding or removing items. Store a copy of the inventory at home and in the unit itself.
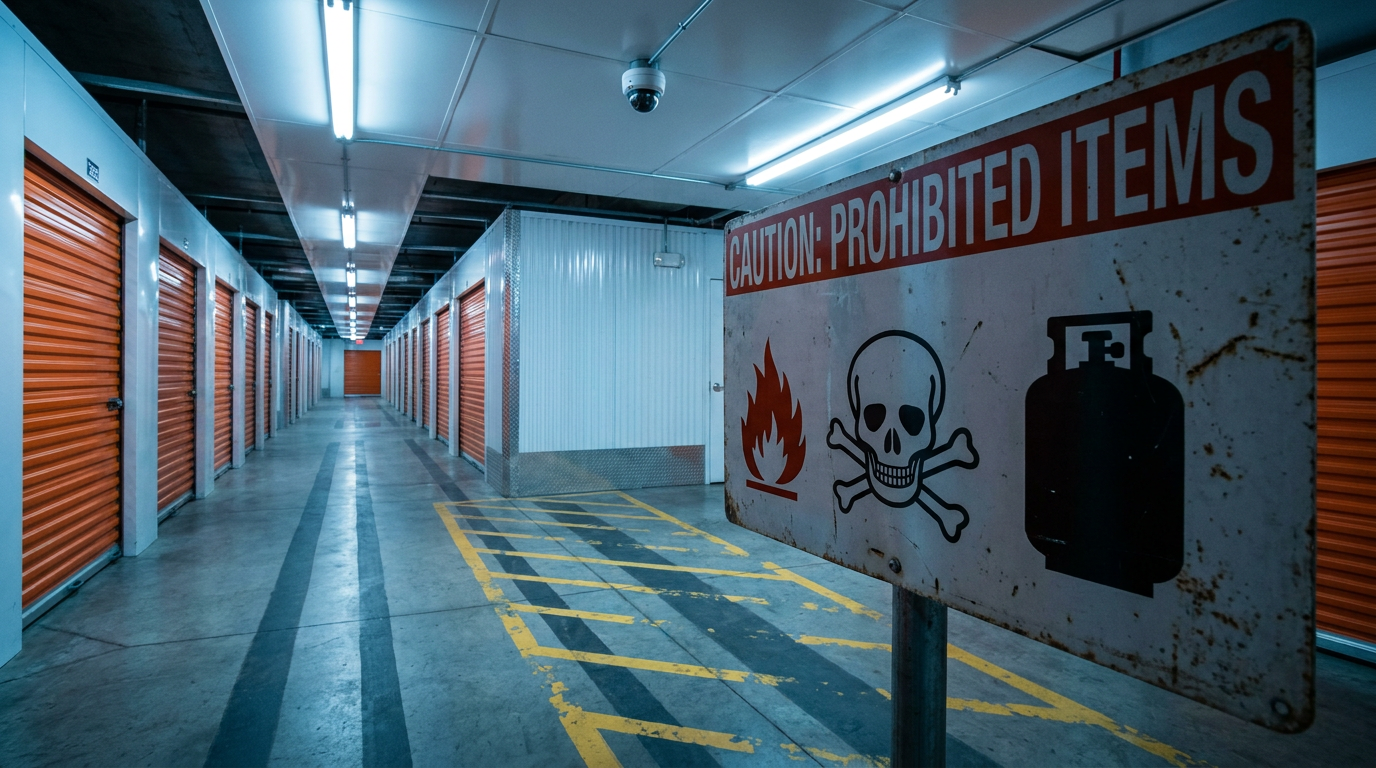
Mistake 5: Storing Prohibited Items
Most facilities prohibit perishable food, flammable materials, and hazardous chemicals. Review your facility's frequently asked questions for specific restrictions. Storing prohibited items risks lease termination and potential liability.
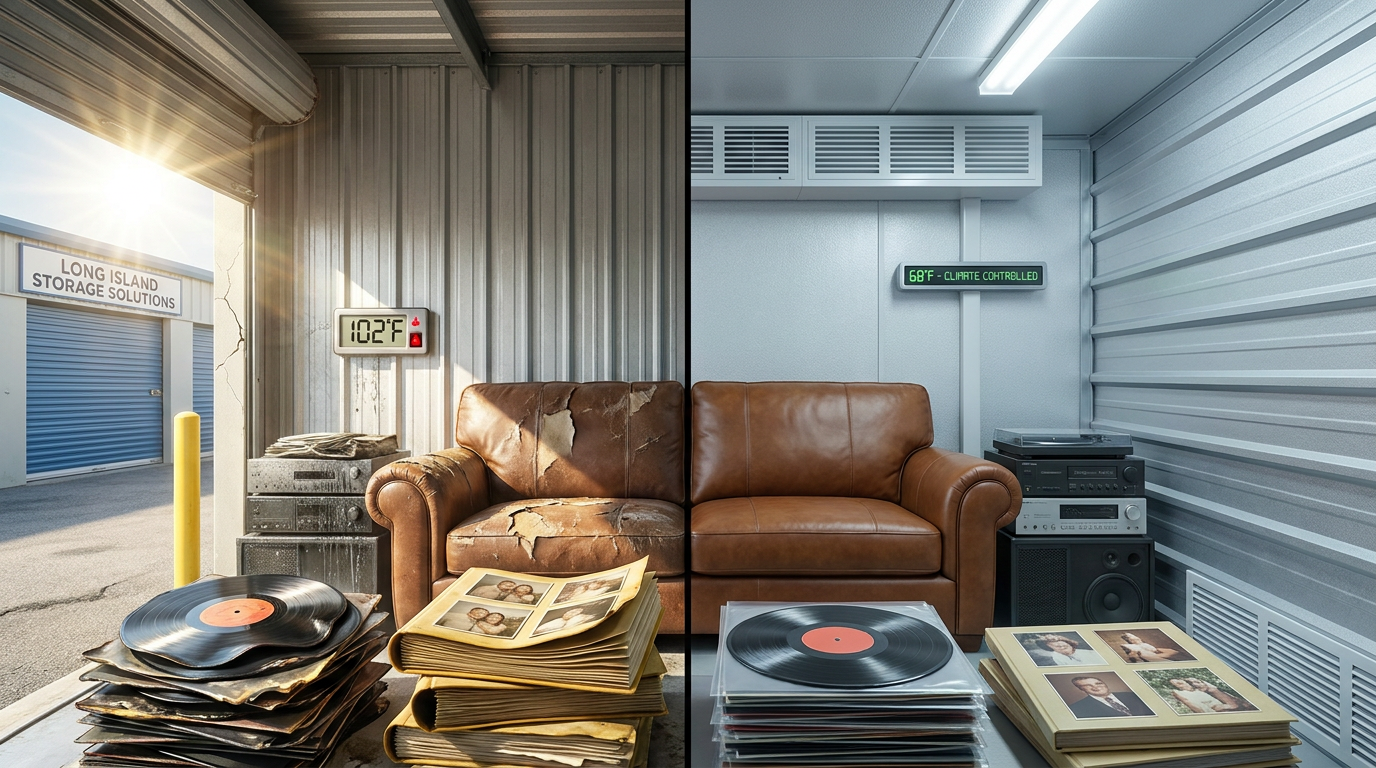
Mistake 6: Ignoring Climate Considerations
Long Island temperatures range from below 20 degrees Fahrenheit in winter to above 90 degrees in summer. Items sensitive to temperature extremes, including electronics, wooden furniture, and photographs, may require climate-controlled storage. Standard drive-up units work well for durable items like tools, sporting equipment, and seasonal decorations.
Mistake 7: Skipping Protection for Valuable Items
Storing valuable items without proper protection invites damage and complicates insurance claims. Wrap furniture in moving blankets, use mattress covers, and place moisture absorbers (silica gel packets or DampRid containers) throughout the unit. Consider adding tenant protection coverage for additional peace of mind.
Is It a Good Idea to Put Clothes in Storage?
Storing clothes in a storage unit works well when done correctly but requires specific preparation to prevent damage. Clean all garments before storing, as body oils and stains attract pests and set permanently over time. The Drycleaning and Laundry Institute recommends professional cleaning for any item stored longer than 3 months.
Use wardrobe boxes ($8 to $15 each from U-Haul or Home Depot) for hanging garments. These tall boxes with built-in hanging rods prevent wrinkles and creases that set during long-term storage. For folded items, use vacuum-sealed bags to reduce volume by 50 to 75% and protect against moisture and pests.
Avoid plastic garbage bags, which trap moisture and promote mildew growth. Cedar blocks or lavender sachets provide natural pest deterrence without the chemical residue of mothballs. Replace cedar blocks every 6 months to maintain effectiveness.
| Clothing Type | Recommended Storage Method | Maximum Duration |
|---|---|---|
| Formal wear, suits, dresses | Wardrobe boxes with breathable garment bags | 12 to 24 months |
| Casual clothing, t-shirts | Vacuum-sealed bags in plastic bins | 24+ months |
| Winter coats, jackets | Wardrobe boxes or large bins with cedar | 6 to 12 months per season |
| Leather and suede | Breathable cotton bags, never plastic | 6 months maximum |
Maximizing Space in Different Unit Sizes
Organization strategies vary based on unit dimensions. A 5x5 unit (25 square feet) requires different approaches than a 10x20 unit (200 square feet). Understanding your specific unit's constraints helps maximize both capacity and accessibility.
Small Units: 5x5 and 5x10
Small units at $135 to $185 per month suit apartment contents, seasonal items, or business file storage. In these compact spaces, vertical organization becomes essential. A single 6-foot shelving unit along the back wall can triple effective storage capacity.
Stack boxes to ceiling height against walls, leaving only a narrow access path. Use the top of dressers and other furniture as additional shelf space. Store items inside furniture drawers to maximize every cubic foot. Check our storage unit size guide for detailed capacity estimates.
Medium Units: 8x10 and 10x10
Medium units ($245 to $275 monthly) accommodate 2 to 3 bedroom home contents. These sizes allow for a proper center aisle while still maximizing wall space. Position two shelving units on opposite walls with the aisle between them.
Create distinct zones for different item categories. The extra floor space allows furniture placement without blocking access to boxed items on shelving.
Large Units: 10x15 to 10x30
Large units ($345 to $595 monthly) store entire household contents, vehicle parts, or business inventory. These spaces benefit from multiple aisles creating a grid pattern. Consider labeling sections like warehouse rows: A1, A2, B1, B2.
In units 10x20 and larger, you can create a small work area near the entrance for sorting and organizing during visits. This staging area prevents the need to remove items to the parking lot when searching for specific belongings.
Maintaining Organization Over Time
Initial organization means nothing without maintenance. The average storage rental lasts 14 months according to the Self Storage Association, providing ample time for organization to deteriorate without consistent effort.
Monthly Maintenance Visits
Schedule brief monthly visits even when you do not need to retrieve items. Check for signs of moisture, pest activity, or shifted boxes. Verify that your inventory remains accurate. These 15-minute visits prevent small problems from becoming major issues.
Facilities with 24/7 access, like Moriches Storage in East Moriches , allow flexible scheduling for maintenance visits at your convenience. Early morning or late evening visits often provide cooler temperatures and less crowded conditions.
Seasonal Reorganization
Rotate seasonal items between zones twice yearly. In spring, move winter items to Zone C and bring summer items to Zone A. Reverse this in fall. This 30 to 45 minute reorganization ensures current-season items remain easily accessible.
Updating Your Inventory
Update your master inventory immediately after every visit. Note items added, removed, or relocated. Date each update for reference. A current inventory eliminates guesswork and repeated trips searching for items you may have already removed.
Quick Reference: Storage Unit Organization Checklist
Use this checklist when setting up or reorganizing your storage unit. Print a copy to bring on your next visit.
- Before moving in: Measure unit dimensions, sketch layout, gather supplies
- Shelving: Position along walls, leave center aisle clear, ensure 250+ pound capacity
- Heavy items: Place on bottom shelves and floor level only
- Frequently accessed items: Store within first 3 feet of entrance
- Labels: Apply to three sides of every box with contents and number
- Aisle: Maintain 24 to 36 inch clearance from door to back wall
- Inventory: Create master list with box numbers and contents
- Furniture: Position against back and side walls, stand mattresses vertically
- Protection: Add moisture absorbers, furniture covers, and pest deterrents
- Documentation: Photograph valuable items, store inventory copy in unit
|